In this guide, I will show you how to get subtitles on Kodi using the OpenSubtitles.org and Subscene.com subtitle services. The methods I have described here work for Kodi on FireStick, Windows PC, Mac, Nvidia Shield, Android and all other Kodi supported devices.
Kodi subtitles become essential sometimes, especially when the audio quality isn’t great or when I must keep the volume low to avoid causing disturbance to the others around. At night, I bring down the volume to the barely-audible level and cannot do without the subtitles. Of course, when I am watching a video in a foreign language, I need my subtitles.
Well, these are my reasons to add subtitles to Kodi and since you are reading this guide, I am assuming you have your own. This is precisely why I have put together this walkthrough to show you how to get subtitles on Kodi 17.6 Krypton. Keep reading!
How to Get Kodi Subtitles Using OpenSubtitles
Opensubtitles is probably the best subtitles service for Kodi. This service has subtitles in a wide range of languages and for nearly all the movies and TV shows that have been released so far.
If you are looking for Kodi subtitles, OpenSubtitles will always be my first recommendation. And, while exploring the subtitles on Kodi, you will see it for yourself that OpenSubtitles has the best ones.
So, without much ado, let’s learn how to get subtitles on Kodi from OpenSubtitles.org.
Your IP 66.249.66.133 is visible to everyone. A VPN hides your IP and protects you from online surveillance, ISP throttling, and hackers. It also unblocks geo-restricted Kodi Add-ons / Builds.
Click HERE to get 3-months free & save 49% on IPvanish’s annual plans. It comes with a 30-day money-back guarantee.
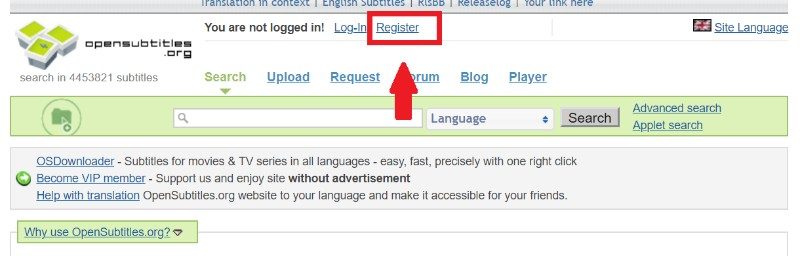
Step 1: The first thing you want to do is register for an account at OpenSubtitles.org. Unfortunately, the subtitles for Kodi from OpenSubtitles cannot be used without the registration. Go to www.opensubtitles.org and click the Register link at the top of the page.
Follow the onscreen instructions to register and to create a username and password
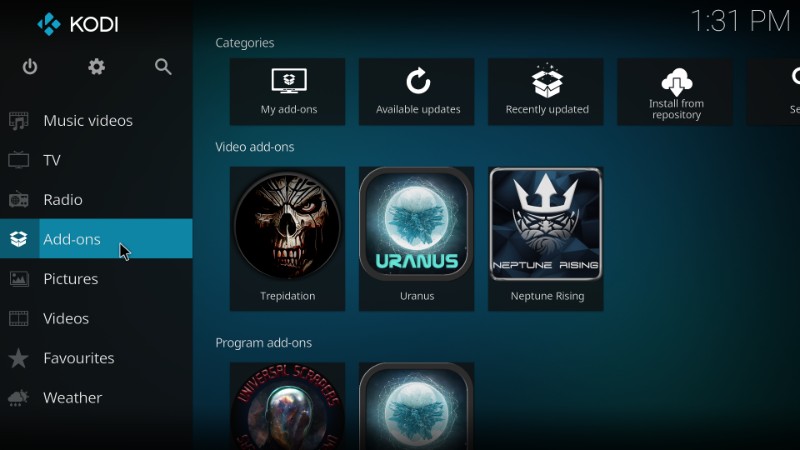
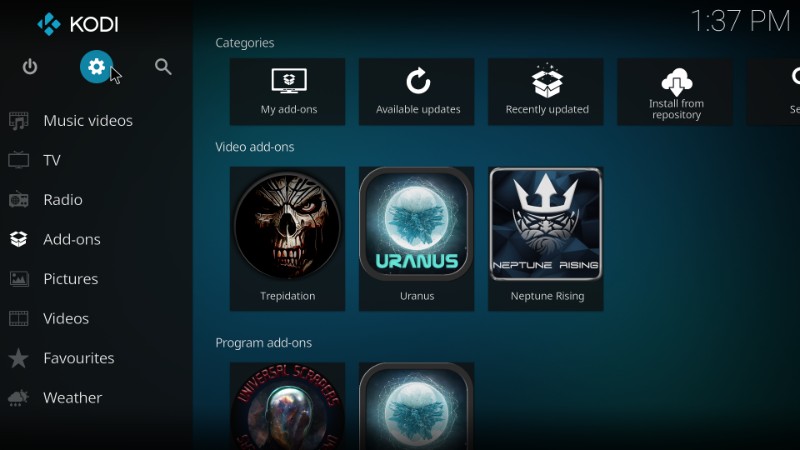
Step 2: Now launch Kodi and select ‘Add-ons’ on the left panel on the home screen
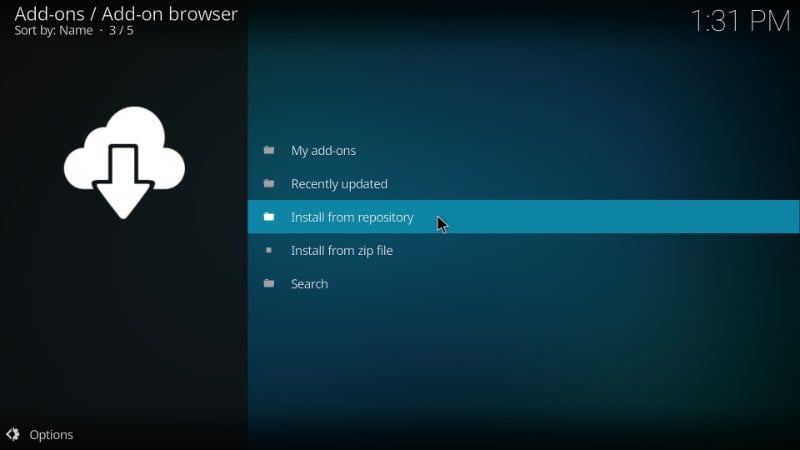
Step 3: Open the Package Installer option on the top-left of the screen. It looks like an open box.

Step 4: Click ‘Install from repository’ on the next screen
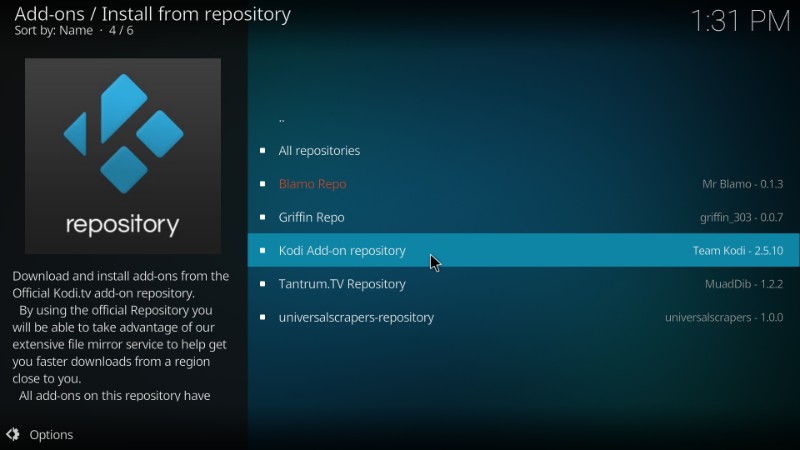
Step 5: Click ‘Kodi Add-on repository’ when you see the list of the repositories. This is the official Kodi repository that comes pre-installed with Kodi
Please note that if you haven’t installed at least one repository other than Kodi Add-on repository, you will not see the list of the repositories above. Instead, after clicking ‘Install from repository’ in step 4, you will be taken directly to the screen that I have added to step 6.
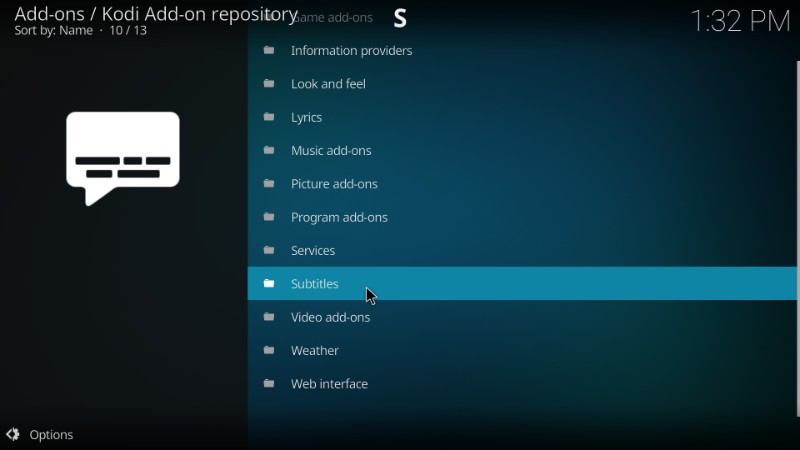
Step 6: Click ‘Subtitles’ when you see this window
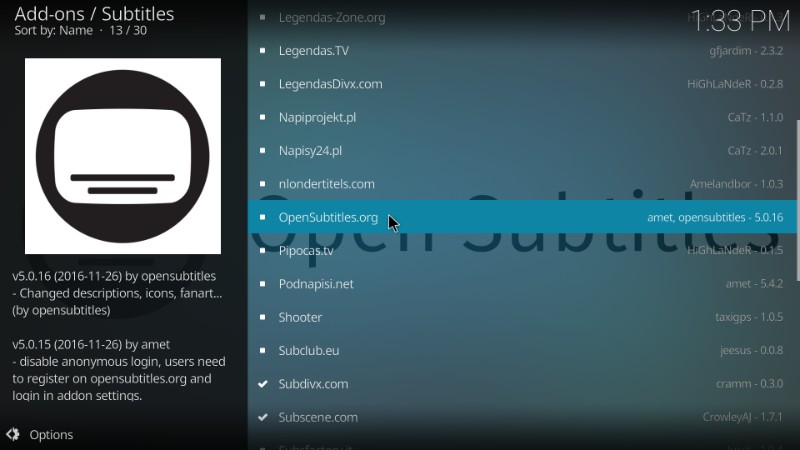
Step 7: Now click ‘OpenSubtitles.org’ from the list
Step 8: Click ‘Install’ button that you see on the bottom-right of the next screen

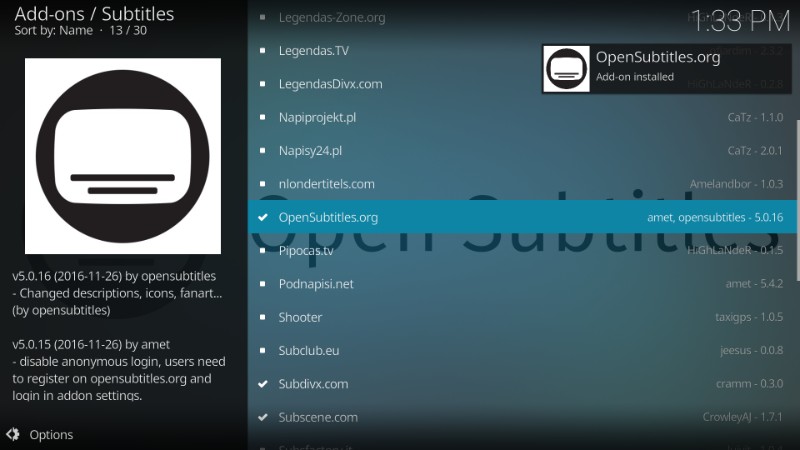
Step 9: Now wait for the ‘Opensubtitles.org add-on installed’ notification (top right; see image below)
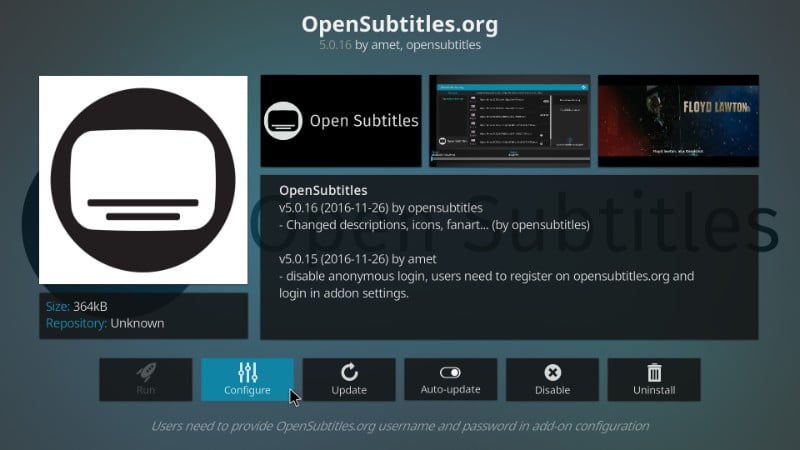
Step 10: Now click ‘OpenSubtitles.org’ one more time and then click the ‘Configure’ button on the next window
Step 11: You will now see the following dialogue box. Click ‘Username’ and enter the username you created for Kodi subtitles at OpenSubtitles.org in Step 1
Click ‘Password’ and enter your OpenSubtitles account password. Click ‘OK’ once done.

Step 12: Return to Kodi home-screen and click ‘Settings’ (the cog icon)

Step 13: Open ‘Player settings’ next

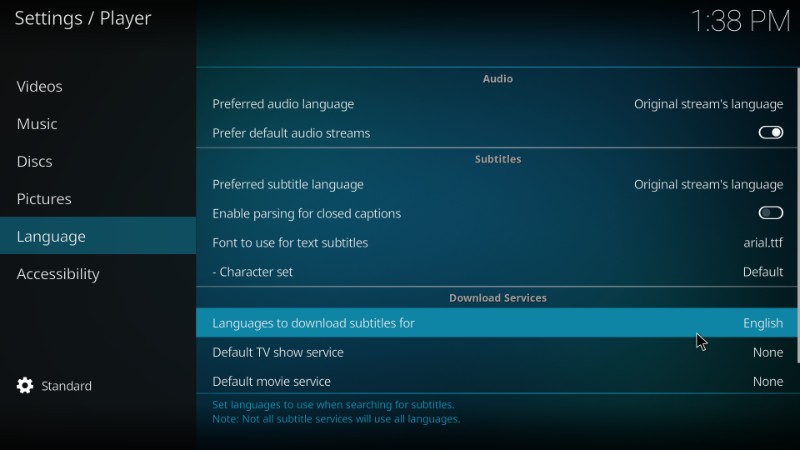
Step 14: Now select the ‘Language’ option on the left panel of the next window
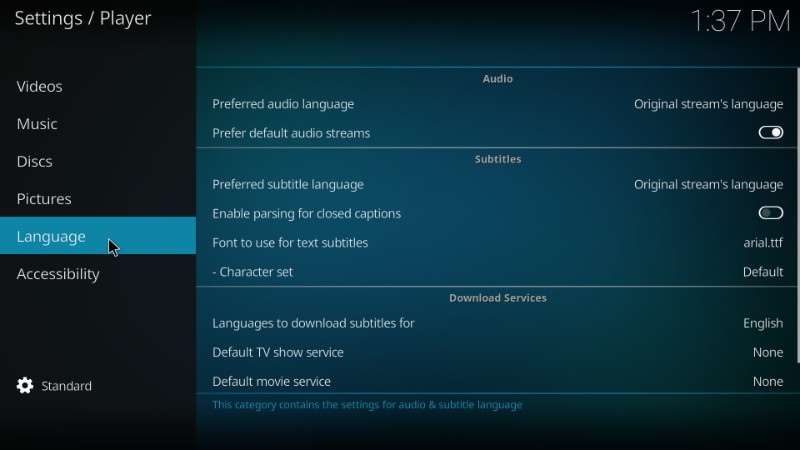
Step 15: On the right, click ‘Languages to download subtitles for’ in ‘Download Services’ to choose your preferred language for subtitles for Kodi. For most of us, the default language will be English.

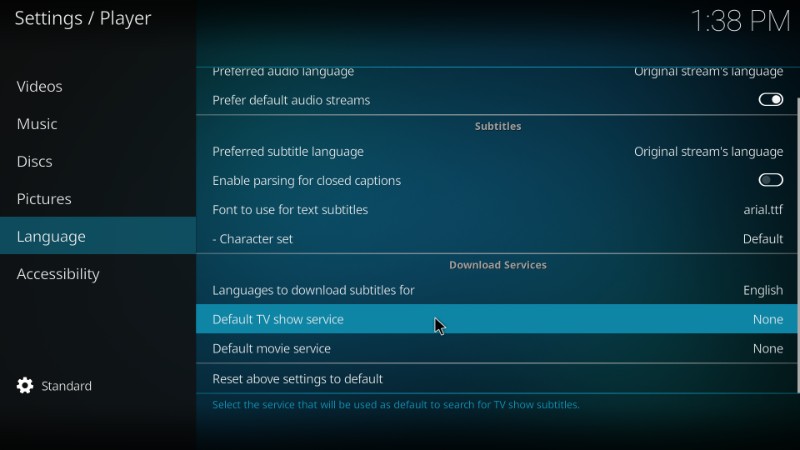
Step 16: Next, click ‘Default TV show service’ to set up Kodi subtitles for TV shows.

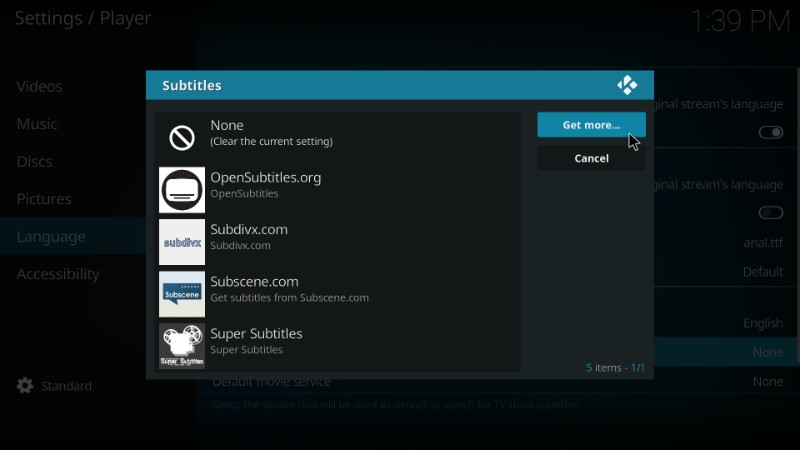
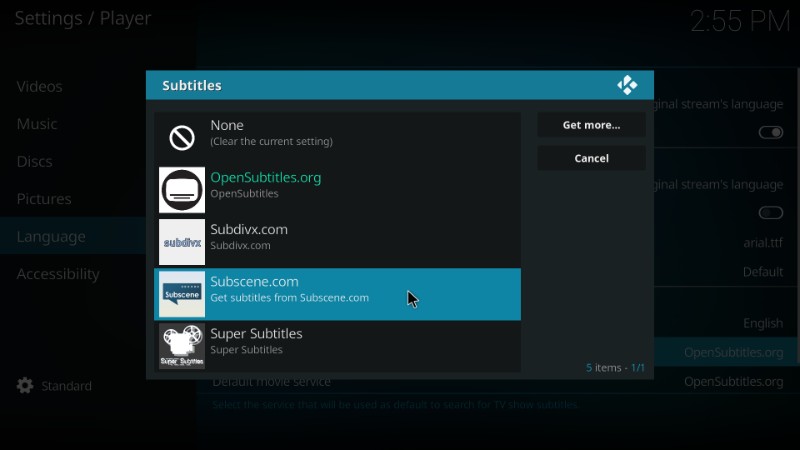
Step 17: Now click ‘Get more…’ button for the list of all the available subtitles for Kodi. Select ‘OpenSubtitles.org’ and click it to download it. As you can see, I have already downloaded OpenSubtitles.org, therefore it is appearing on the list.
Step 18: Once you have downloaded OpenSubtitles.org, click it (as shown in the image below) to set it up as the Kodi subtitle service.

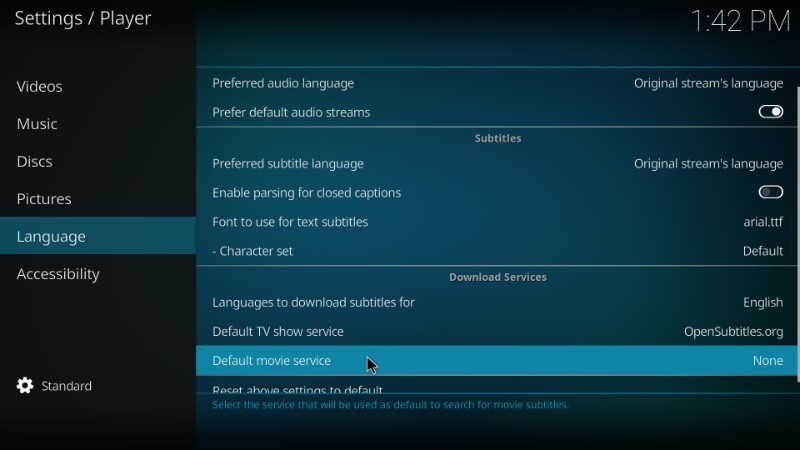
Step 19: Now click ‘Default movie service’ and repeat Step 18
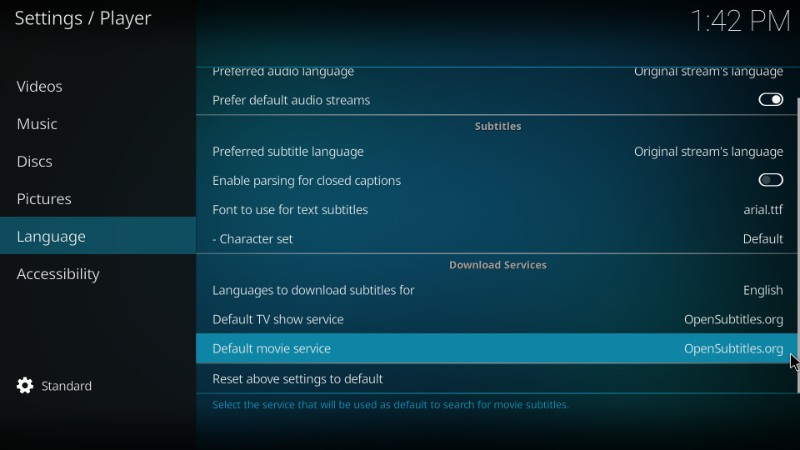
Step 20: This is how the screen will look like once you install and set up Opensubtitles on Kodi
Well, this is pretty much you need to do to add Kodi subtitles. Now, go ahead and play the TV show or movie of your choice and click the subtitles icon on the bottom right. OpenSubtitles will look up for the subtitles for the title you are playing.
How to Get Subtitles on Kodi Without Registration
I have no second thoughts about the fact that Opensubtitles is the best Kodi subtitles service. But, it is also true that it takes a little doing to set it up on Kodi. If you want to install subtitles on Kodi rather quickly, I have another option for you – Subscene Kodi subtitle service.
Subscene may not have as many subtitles for Kodi as OpenSubtitles but it can do the job fairly well for the most part. And, you can set it up directly from within Kodi without having to register an account.
Let me show you how to add subtitles to Kodi using the Subscene.com service in quick and easy steps
Step 1: Go back to the Kodi home-screen and click ‘Settings’ on the top-right (just under the Kodi logo). Now, click ‘Player Settings’ from the list of the options
Step 2: Now, select the ‘Language’ option on the left panel and under ‘Download Services’ on the right click ‘Languages to download subtitles for’ to change/select the desired language Kodi subtitles. English is the default language and if English is the language you want, leave this option untouched.
Step 3: Now click ‘Default TV show service’
Step 4: Click ‘Get more…’ button and download the Subscene.com subtitle service for Kodi. I had already downloaded it and that is why you can see it on this list. Once you have installed Subscene.com, it will also appear on your list

Step 5: Now click ‘Subscene.com’ to make it your default Kodi subtitles service
Step 6: Now click ‘Default movie service’ and repeat Step 5.

You have now successfully set up Subscene.com and it will fetch you the available subtitles for Kodi for the specific title you are playing.
Note: Selecting Subscene.com as your default subtitle service for Kodi does not mean you cannot use Opensubtitles anymore. While looking up for the subtitle when the title is playing, you can always choose Opensubtitles or any other subtitle service you may have installed.
Conclusion
Kodi experience sometimes becomes more enjoyable with the subtitles. OpenSubtitles and Subscene are the two best subtitles for Kodi. Subscene is a quicker way to get the subtitles on Kodi. However, on occasions, you will notice that Subscene subtitles are out of sync with the video. That seems like a setback but it doesn’t have to be. While playing the video you can always offset the subtitle by delaying or advancing it to bring it in sync. Offsetting usually works. But, when it doesn’t, you can always go with OpenSubtitles. I have barely experienced any syncing issues with it.
So, this is how we set up Kodi subtitles using the top two subtitle services. If you have any questions, feedback or suggestions, feel free to fill us in through the comments section below.
Related:
How to install Kodi on FireStick
100 Best and Working Kodi Addons
25 Best Kodi Builds
How to Update Kodi on FireStick
How to Stop Buffering on Kodi
Disclaimer –Â Husham.com.com do not host or link to copyright-protected streams. We highly discourage piracy and strictly advise our readers to avoid it at all costs. Any mention of free streaming on our site is purely meant for copyright-free content that is available in the Public domain. Read our full disclaimer.
(function(d, s, id)
var js, fjs = d.getElementsByTagName(s)[0];
if (d.getElementById(id)) return;
js = d.createElement(s); js.id = id;
js.src = “http://connect.facebook.net/en_US/sdk.js#xfbml=1&version=v2.6”;
fjs.parentNode.insertBefore(js, fjs);
(document, ‘script', ‘facebook-jssdk'));
Written by David Minister
