This is the ultimate and complete setup guide for setting up and installing retro games in Kodi. Get tips and troubleshooting help for setting up your controller with Kodi, installing emulators, finding retro video game roms, and more.
Have a question that this guide doesn’t answer? You can comment below or get in touch with us on Twitter and we would be happy to assist!
Use the table of contents below to jump to a specific area where you are stuck, or keep scrolling to read our entire retro games re Kodi guide now.
Video Guide
Retro Games in Kodi: Table of Contents
- Retro Games in Kodi: Introduction
- Kodi 18
- What video games are supported?
- Sega Dreamcast & N64 support
- Syncing and Configuring Your Controller
- What Controllers are Supported in Kodi?
- How to Pair Your Controller
- Getting Kodi to recognize your controller
- Installing controller addons for each controller
- Configure your controllers for games
- How to Install & Play Video Games in Kodi
- Installing Emulators
- Installing Roms
- How to Configure IAGL Addon
- Other Retro Games in Kodi Help & Tips
- Retroarch External App Setup
- Kodi Games on Xbox
Retro Games in Kodi: Introduction
Kodi 18

Since the release of Kodi 18 Leia, the Kodi software has had full support for retro video games in Kodi. That means that you can sync a controller to Kodi (or use a keyboard), install classic video game consoles (called emulators), and load retro video games (called roms).
Kodi allows retro video games through its inclusion of the RetroPlayer framework, which is a popular software package containing some of the biggest emulators.
What Video Games Systems are Supported in Kodi 18?
Kodi 18 includes support for a number of video game systems, including:
- Nintendo / Super Nintendo / Nintendo DS
- Gameboy / Gameboy Advance / Gameboy Color
- Playstation One
- Sega Saturn
- DOS
- Lynx
- Atari 2600
Status of Sega Dreamcast & Nintendo 64 (N64) Support in Kodi 18
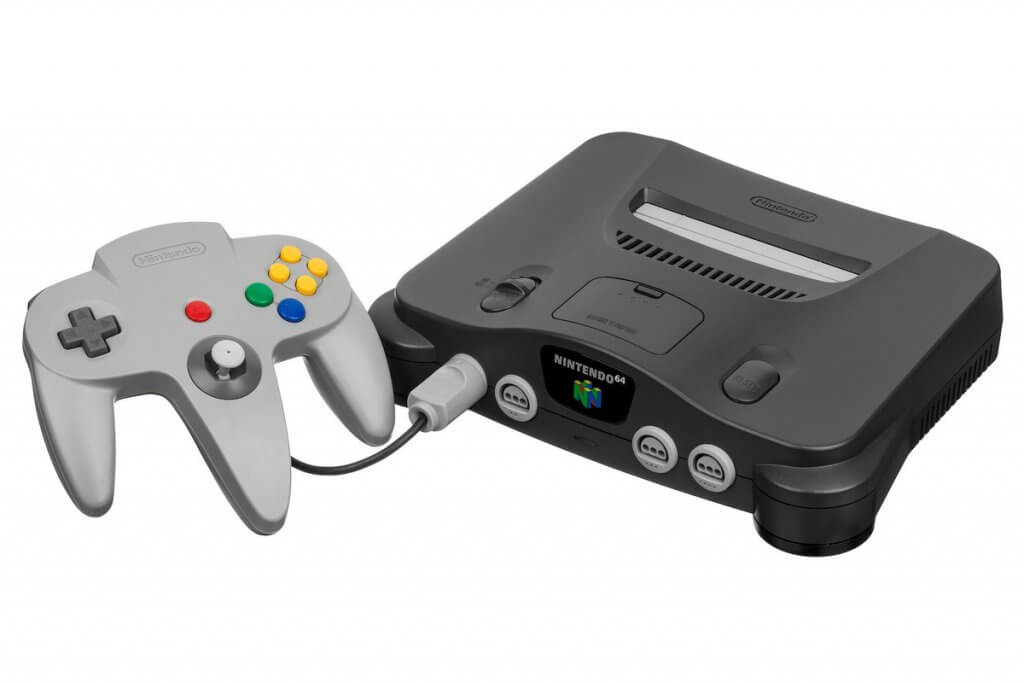
Two popular retro consoles are not currently supported in Kodi 18: the Sega Dreamcast and the N64. N64 and the Dreamcast cores both require OpenGL support, which is not currently included in the Retroplayer framework.
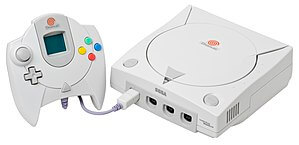
You will not be able to play Sega Dreamcast or N64 retro games in Kodi internally, but we will show you how to set these up to an external link later on in this guide!
Next up, we will have a look at how to get your controller setup in Kodi.
Syncing and Configuring Game Controllers in Kodi
This area of the guide is to help you setup and configure your game controller for retro games in Kodi. It covers a few important components, including:
- What Controllers are Supported in Kodi?
- How to Pair Your Controller
- Getting Kodi to recognize your controller
- Installing controller addons for each controller
- Configure your controllers for games
What Controllers are Supported in Kodi?
Kodi supports a number of the most common controllers, including:
- XBox
- Sony Playstation
- Nvidia Shield
- Generic game controllers (as long as they have bluetooth or USB support)
How to Pair Your Controller
To get your controller working with Kodi, you first have to set it up on the hardware you have Kodi loaded onto. For most people, that is probably and Android TV box, but this guide should work for Mac, Windows, and Linux as well.
If you want to use the controller wired, then plug it into your device. If you want to use the controller over Bluetooth, just turn it on and make sure it is NOT synced with any other powered on hardware.
Pair Game Controller on Amazon Fire
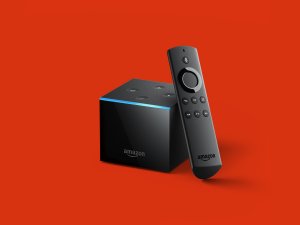
If you are using the Amazon Fire as your hardware of choice, then you want to navigate to Settings > Controllers & Bluetooth Devices.
Select the Game Controllers option and then click on Add New Game Controller.
The Amazon Fire will now search for known game controllers using Bluetooth.
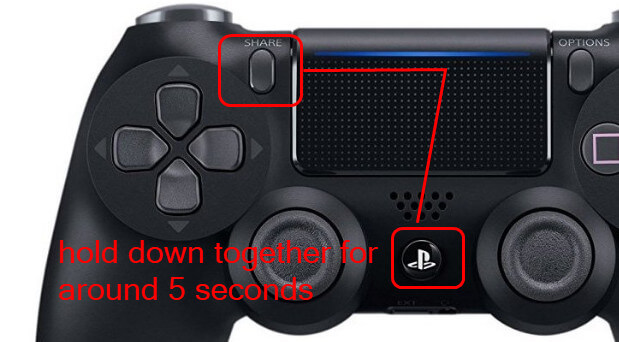
If you are using the Playstation 4 controller, you must hold down the center PS button and the ‘Share’ button at the same time. For most other game controllers, you simply turn on the controller and then press the ‘sync’ button on the controller.
When the Amazon Fire recognizes your controller, it should be added to the list on the screen and you will be able to use the controller to navigate the menus.
Pair Game Controller on Android TV
If you have an Android TV box, pair your controller by navigating to Settings (gear icon) > Devices & Accessories > Add Accessory.
If you are prompted to turn Bluetooth ON on your Android TV box, allow this to happen. Your box will now be looking for game controllers
Once again, if you are using the Playstation 4 controller, you must hold down the center PS button and the ‘Share’ button at the same time. For other game controllers, you simply turn on the controller and then press the ‘sync’ button on the controller.
When the Android TV box recognizes your controller, it should be added to the list on the screen. If your controller has been recognizes, scroll down and click OK. You will be able to use the controller to navigate the menus.
How to Get Kodi to Recognize Your Game Controller
By default, you should be able to use your controller and launch Kodi from your boxes main menu as normal. You will probably get to navigate Kodi using your controller right at this point.
If Kodi does not recognize your game controller by default, it may be disabled in Kodi’s settings. To fix this issue:
- From the Kodi main menu, click on Settings (gear icon)
- Select System and head to the Input tab.
- On the right, click on Configure attached controllers.
- Kodi will prompt you to enable the add-on configuration. Select Yes.
- A window will show your installed gamepad along with any profiles you have set up. Simply click “OK†to save and exit and see if your controller works now.
Now that your game controller is setup, you are closer to playing retro games in Kodi!
How to Install Controller Addons in Kodi
In order to properly use each emulator (like Nintendo, Super Nintendo, etc), you need to install specific controller addons that map out how your connected controller simulates each console’s native controller as follows:
- From the Kodi main menu, click on the Add-ons icon (open box icon).
- Select Install From Repository
- Click on the Kodi Add-on Repository
- Click on Game Add-ons
- Select Controller Profiles
From this screen, you must install controller profiles for all of the emulators you wish to use. So if you plan on playing Super Nintendo and Atari 2600 games, you must install these controller profiles.
How to Configure Your Controllers for Retro Games in Kodi
Next, you need to configure the buttons for all of the controller addons you just installed. You have to map buttons from each original controller to your new controller which you have synced.
- From the Kodi main menu, click the Settings gear icon.
- Select System and then navigate to the Input tab.
- Select Configure attached controllers.
- If Kodi asks you to enable the addon configuration, select Yes.
- You will see all of the control addons you installed for retro games in Kodi.
- Choose the one you want to edit and then scroll to the right where the Buttons are listed.
- Click each button and select it. The assigned button will be replaced by a prompt for you to press the equivalent button on your controller. So if you select the “A†button, then you’ll want to click the button on your controller you want to match A.
- Repeat this process for each button on every controller.
- When you are done, select OK to save your settings,
You have now installed controller addons and configured them and are one step closer to playing retro games in Kodi!
Next we get to the fun part – installing and playing games!
How to Install & Play Video Games in Kodi
Retro video games in Kodi are made possible by the use of roms and emulators. Emulators are little software programs that mirror old video game consoles. Roms are software replicas of video games that can be read by the Retroplayer emulator that comes packaged by Kodi.
You can install the roms or the emulators first, but we will show you how to install emulators since you already have everything you need in kodi.
How to Install Emulators in Kodi
- From the Kodi main menu, click on the Add-ons icon (open box icon).
- Select Install From Repository
- Click on the Kodi Add-on Repository
- Click on Game Add-ons
- Select Emulators
From the giant list of emulators you now see, you have to install the ones you wish to use. It’s a good idea to install at least one emulator for all of the different video game consoles you plan on playing retro games in Kodi from.
For some of the consoles where there is more than one emulator listed, here are our recommendations:
- Ninetendo DS = DeSmuME
- Game Boy Advance = mGBA
- NES = bnes
- SNES = Snes9x
- Sony Playstation = PCSX ReARMed
If you are having trouble getting some games to work with the emulators you have installed, feel free to try others!
Next, let’s move on to talking about the roms, which are the actual retro games you want to play in Kodi.
There is an awesome addon called the Internet Archive Game Launcher (IAGL) that allows you to play any and all retro games in Kodi. Let’s walk through how to install the IARL addon and then we’ll also show you how you can add your own roms into Kodi and setup a directory to play them.
How to Install the Internet Archive Game Launcher Kodi Addon

- Click here to access the Zach Morris Kodi Repository. Click the repository-xachmorris-x.x.zip file and then click on Download to download the repostory.
- Go back to your home screen.
- ON Kodi 17 Krypton or later: Select Add-ons > Add-on Browser (open box)
- ON Kodi 16 or earlier: Select SYSTEM > Add-Ons
- Select Install from Zip File and located the repository.zachmorris-x-x.zip file you download above. Click on it and wait for the Add-on enabled notification
- Select Install from Repository > Zach Morris Add-ons >Â GameAdd-ons > Game Providers > Internet Archive Game Launch > Install
- Wait for Add-on enabled notification
When you launch the Internet Archive Game Launch Kodi addon, you will see a ton of game consoles listed. Navigate through to a game you want to play and click Launch to open up the emulator you installed above and to start playing the game!
How to Configure Internet Archive Game Launch Kodi Addon (IAGL)
In order to use the IAGL Kodi addon without any issues, there is a setup wizard that has to take place. Complete these steps:
- Launch the IAGL Kodi addon settings. You can do this by hovering on the IAGL addon and long pressing on it or pressing menu (â€c’ button) to bring up the context menu. Then, click on Settings.
- Scroll down to the Setup Wizard tab.
- Under Emulator Launcher, you want to select either “Kodi Retroplayer†or “External†based on how you will be playing the majority of your emulators.
- Since this is a retro games in Kodi guide, we will select “Kodi Retroplayer†and show you how to update a few select emulators to external later if you wish.
- Click on Execute Setup Wizard and follow the instructions.
Other Retro Games in Kodi Help & Tips
How to Install Retroarch

If you want to use an external emulator to play retro games outside of Kodi or you want to try out Sega Dreamcast or Nintendo 64 roms, you can do that!
First off, you need to install the Retroarch app, which is software that contains all of the same emulators you saw above.
A list of where to download and install Retroarch is as follows:
- Windows, OSX users: Download Retroarch from here.
- Linux users: Install Retroarch with from the PPA. See here for stable releases and here for nightly releases.
- Raspberry Pi users: Install the Kodi addon Gamestarter to install Retroarch directly from Kodi.
- LibreElec users (both x86 and RPi) have 2 options: Use the LibreElec “Remix†build herewhich includes Retroarch, or use the Kodi addon Gamestarter to install Retroarch directly from Kodi.
- OpenElec users (x86): Use the Kodi addon Gamestarter to install Retroarch directly from Kodi.
- Android users: Retroarch is available from the Play store.
- S905 users: Use the LibreElec “SX05RE†build here which includes Retroarch
Install Retroarch on your device.
Next, we have some basic Retroarch setup to perform before we tell the Internet Archive Game Launch Kodi addon to launch it as an external app.
How to Setup Retroarch External App
- Launch the Retroarch app you installed above.
- Go to Online Updater
- Then, go to Core Updater
- Click on at least one core for every system you’d like to play to update it.
It is highly recommended that you update the Core Info Files, Assets, Autoconfig Profiles, Cheats, Databases, Overlays, and Shaders from the Online Updater Page so that you have the latest version of everything included in Retroarch.
How to Configure Retroarch Location in IAGL Kodi Addon
- Run Kodi and head into your video addons where the IAGL Kodi addon sites.
- Hover over top of it and long press or press the menu (‘c’ button) and then select Settings.
- Go into the External Launchers tab.
- Click on My System Type and select it from this list.
- You will have to complete all of the fields that now show up in order to get Retroarch to launch for specific emulators (which we will configure in a second).
Here are some helpful hints about some of the options that you will see:
- Retroarch System Folder = This is the “com.retroarch†folder that installs when you install Retroarch on your Android box. It will be located at //data/data/com.retroarch/ for most users.
- Retroarch CFG Location = This is the “retroarch.cfg†file location, which stores a bunch of retroarch settings. It can be located in a number of locations including:
- /mnt/internal_sd/Android/data/com.retroarch/files/retroarch.cfg
- /sdcard/Android/data/com.retroarch/files/retroarch.cfg
- /data/data/com.retroarch/retroarch.cfg
- Close Kodi on Launch =Â Some operating systems allow you to close Kodi when Retroarch is opened if you wish.
- Pause Kodi on Launch = Likewise, some operating systems pause Kodi when Retroarch is launched so that it does’t take up any resources.
How to Launch Retroarch From IAGL Kodi Addon
Once your external location is setup, we can force some of the retro games in Kodi to launch the external app verses the internal one.
- Launch the Internet Archive Game Launch Kodi addon
- Head into the Browse All Lists playlist
- Hover on the console you want to launch using Retroarch, such a Sega Dreamcast or Nintendo 64.
- Long press or press the menu button to bring open the context menu and then select Update Launch
- Change this from Kodi to External to use the external settings you setup above.
Kodi Games on Xbox One Status
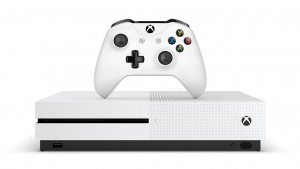
There is one giant exception to this entire guide – The Xbox. Last year, Microsoft allowed the Kodi software to be installed on the Xbox One as long as Kodi complied with all of Microsoft’s terms and conditions related to the system.
One of those major terms is that the Xbox One does not allow the installation of any video game emulators on its console. Thus, all of the Retroplayer dependencies and files are not included with the Xbox One version of Kodi and you will not be able to play retro games in Kodi on the Xbox One.
Do you have other retro games in Kodi setup questions or tips you want answered? Comment below or get in touch with us on Twitter and we will try to help you out!
