

The Xtina addon is another Exodus fork that is definitely worth checking out. If you are familiar, many people use it as their go-to addon. If you like solid addons, you are sure to love this one. You won’t want to miss out on this one. To get it, use our guide to help you download and install this great option today.
| Reminder: Using a VPN with Kodi will allow you to privately access all Kodi add-ons. We recommend ExpressVPN, a fast, no-log VPN. You can use their Fire TV app to change IP and unblock restrictions. Save 49% off unlimited VPN with our promotion. |
.
Because this addon is supported by the specific team, it is not considered to be official. In other words, don’t go to official Kodi websites to ask for support or mention it. They will not be able to help you. Though Kodi is open source, it is understood that unofficial addons should not be talked about.
How to Install Xtina Addon for Kodi v18 Leia
First, we will start with the Leia version of Kodi.
- Start by opening Kodi.
- On the left side, you will see the main panel.
- Go to Settings by clicking on the gear icon. In the rows of icons you see here, select the one that says File Manager. When you see the list, scroll down and choose Add source.
- By doing so, you’ll see a box pop up that says Add file source.
- Next, click on the highlighted line that says
. - Enter exactly repo.htmc.tv/ and hit the Done button.
- This addon needs a name. Enter the name htmc or whatever you want to call it.
- Now, click the OK button to add the file.
- Once added, return to the home screen and click Add-ons. You should then see an open box icon in the upper left corner. Go ahead and click on it.
- Select Install from zip file > htmc > repository.htmc-x.x.x.zip.
- Wait for the notification message.
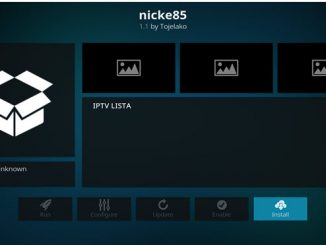
- Go again to Install from repository and now HTMC Repository > Video add-ons > Xtina.
- Select Install.
- Wait for Add-on enabled notification.
- Access by going back to the Home screen > Add-ons > Video Addons > Xtina.
How to Install Xtina Addon for Kodi v17 Krypton
First, we will start with the Krypton version of Kodi.
- Start by opening Kodi.
- On the left side, you will see the main panel.
- Go to Settings by clicking on the gear icon. In the rows of icons you see here, select the one that says File Manager. When you see the list, scroll down and choose Add source.
- By doing so, you’ll see a box pop up that says Add file source.
- Next, click on the highlighted line that says
. - Enter exactly repo.htmc.tv/ and hit the Done button.
- This addon needs a name. Enter the name htmc or whatever you want to call it.
- Now, click the OK button to add the file.
- Once added, return to the home screen and click Add-ons. You should then see an open box icon in the upper left corner. Go ahead and click on it.
- Select Install from zip file > htmc > repository.htmc-x.x.x.zip.
- Wait for the notification message.
- Go again to Install from repository and now HTMC Repository > Video add-ons > Xtina.
- Select Install.
- Wait for Add-on enabled notification.
- Access by going back to the Home screen > Add-ons > Video Addons > Xtina.
 |
Written by David Minister


Be the first to comment