So, you want to dive into the world of Kodi and its popular addons? However, maybe you’re not sure where to start, or which addons to install. Don’t worry, we are here to help. By the end of this article, you will learn how to install Kodi on numerous different platforms. In addition, we will guide you through the simplest method of installing the most popular streaming addons. Welcome to our Ultimate Kodi Installation Guide!
Disclaimer: We will be talking about software developed for Kodi – which is based on open-source code. However, the following software comes from unofficial third-parties. In addition, it is publicly available and free of charge. Husham.com doesn’t claim any responsibility for how our readers decide to utilize the following software. Please note that we don’t condone sharing pirated content and copyright infringement. Husham.com is not affiliated with the software mentioned in this article in no way. Make sure to carefully read the above-said disclaimer and ensure the proper use of the software.
WARNING: Before You Continue…
Even without your explicit consent, your ISP (Internet Service Provider) is collecting and filtering your Web browser data. This means that using Kodi to stream copyrighted content might get you into legal trouble. Also, your ISP might block access to specific streams, which leads to Kodi errors, or entirely blocked and throttled streaming. This is why users of Kodi should always use a VPN to make sure their identity and privacy are protected while streaming.
Husham.com’s editorial team uses and strongly recommends ExpressVPN. This is, by far, the fastest and most reliable VPN with the power to unblock any website and service. Once activated, ExpressVPN encrypts your Web traffic and makes it anonymous – keeping it away from your ISP’s prying eyes. In fact, you will become invisible on the Web since your user logs, and your traffic history isn’t stored on any server.
Make sure your Web browsing and streaming aren’t used against you. Subscribe to ExpressVPN and enjoy using Kodi without any restrictions!
Ultimate Kodi Installation Guide: Step-by-Step Instructions
This guide is dedicated to newbies and season hobbyists who would like to see what Kodi offers. Here at Husham.com, we are passionate fans of this home theater software. This is why we’re dedicated to bringing the latest news, reviews, and installation guides for everything Kodi-related. Throughout this article, you will find numerous links to helpful resources on our website, so make sure to use them. Let’s get started, shall we?
Step #1: Download & Install Kodi
The good news is that Kodi is available on just about every popular platform. You can install it on your computer, mobile device, or even on a media streaming device. Husham.com already features a number of installation guides, so make sure to click on the link for the platform of your choice.
- Computers (Desktop OS): First and foremost, you can install Kodi on Windows, Mac computers, and Linux. Click on any of the provided links for a detailed guide to downloading and installing Kodi;
- Android Devices: You can install Kodi natively on Android and Chromebook computers. The application is available in the Google Play Store, which makes this process as straightforward as it can possibly be;
- Apple Devices: When it comes to Apple-made devices, you can install Kodi on iOS, which includes iPhones and iPads. Additionally, you can run Kodi on Apple TV as well;
- Media Streaming Devices: Some of the most popular streaming devices are great for using Kodi and accessing its vast streaming library. Here’s how to install Kodi on Fire Stick, Roku, Nvidia Shield TV, and Razer Forge TV.
- Gaming Consoles: More than a month ago, Kodi appeared on the Xbox Store. So, make sure to check out how to install Kodi on Xbox One devices;
- Other Devices: Finally, you can install Kodi on Raspberry Pi and as well as some smart TV models. Check out the provided links for more info.
Step #2: Add Fusion Source to Kodi
Hopefully, you have followed one of our guides to install Kodi on your device of choice. Now, we will proceed to install the most popular addons. However, the best way to do this is by using Git Browser. But first, we need to install the Fusion repository where GitHub is located. Keep on reading.
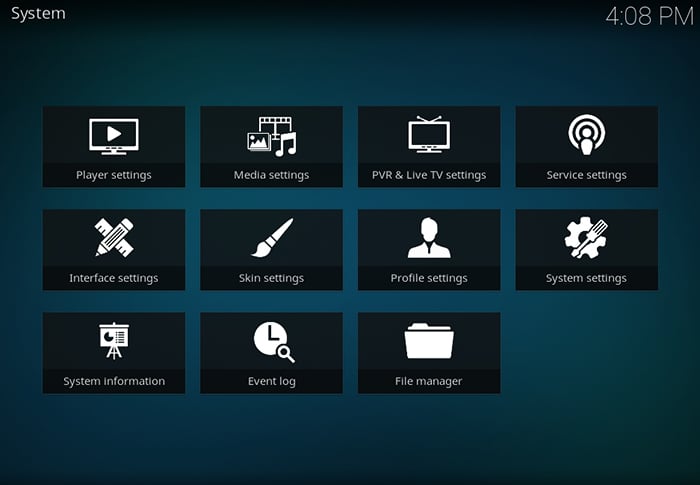
- Launch Kodi and click on the Cogwheel icon (top-left icon);
- Click on the File Manager icon;
- On the left side of the screen, double-click on ‘Add Source’;
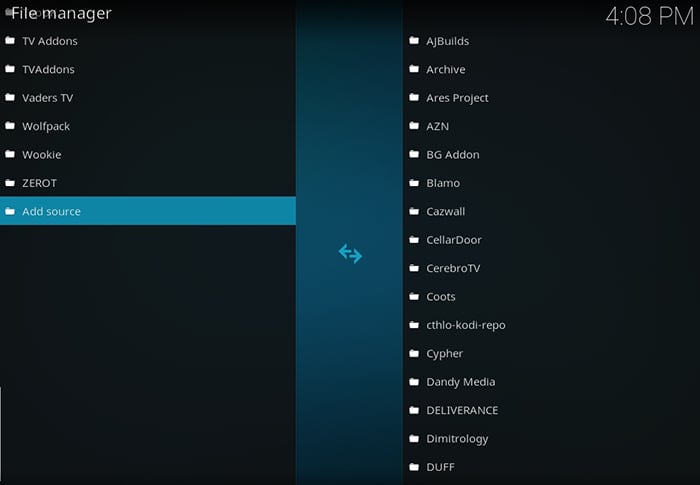
- At this point, you should see a new pop-up. Click on ‘’;

- You will be asked for a new URL. Make sure to carefully copy and paste the following URL address: fusion.tvaddons.co. Click on ‘OK’;
- Give a new to the new source, something like ‘Fusion’. Then, click on ‘OK’ to dismiss the pop-up;
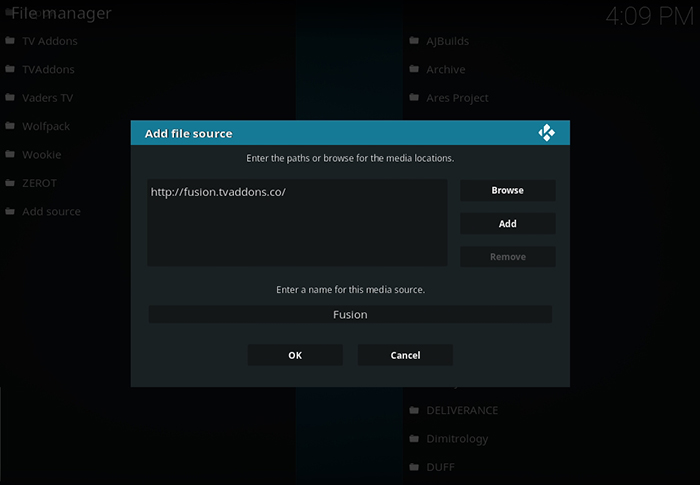
- Return to the home screen of Kodi. You have successfully installed added a new source.
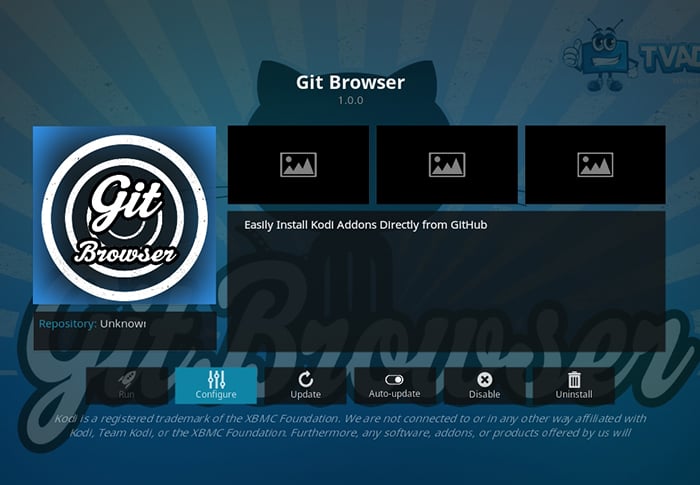
Step #3: Install Git Browser
Once you’ve added the Fusion source to your Kodi, we need to access it and install the Git Browser. This is a recently released addon that let you easily install other popular addons. Instead of having to do that manually, you can use the GitHub Browser to install addons with ease.
- First, make sure to enable unknown sources on Kodi. This will allow us to install third-party addons without any issues;
- Next, click on ‘Add-ons’ in the main menu;
- Then, click on the Open Box icon in the top-left corner;
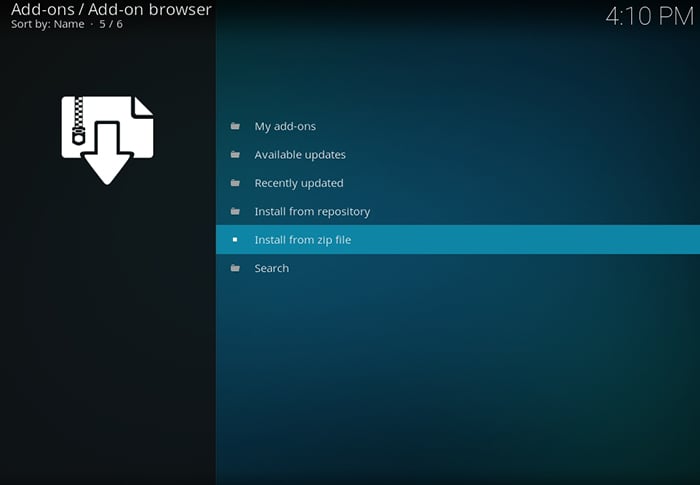
- Select ‘Install from ZIP file’;
- Using the newly opened pop-up go to Fusion > Kodi-Repos > English. This is where you need to find and click on the file named ‘repository.xbmchub-3.0.0.zip’;
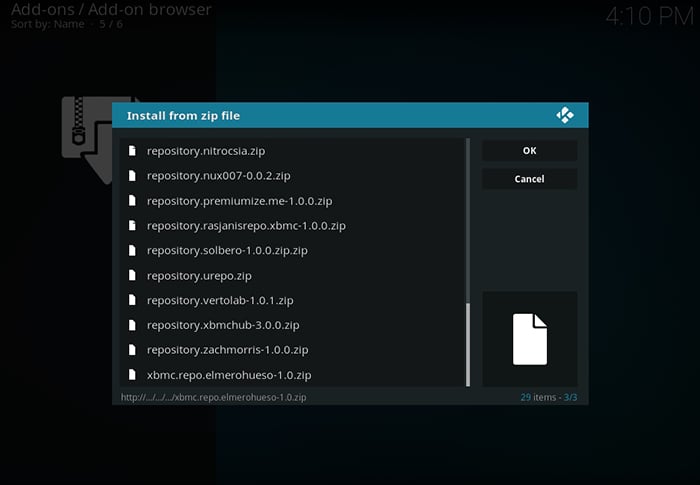
- Wait for a few moments until you see that a new repository is added to your Kodi;
- Next, click on ‘Install from Repository’;
- Navigate to TVADDONS.CO Add-on Repository > Services > Git Browser. Click on the addon’s name;
- Finally, use the ‘Install’ button to install the Git Browser.
Step #4: Enable Live Streams
Before we start installing addons, it’s important to make sure that dependencies are enabled. This will help us to avoid any problems while installing and downloading third-party addons.
- From Kodi’s home screen, click on ‘Add-ons’ in the main menu;
- Go to ‘My Add-ons’;

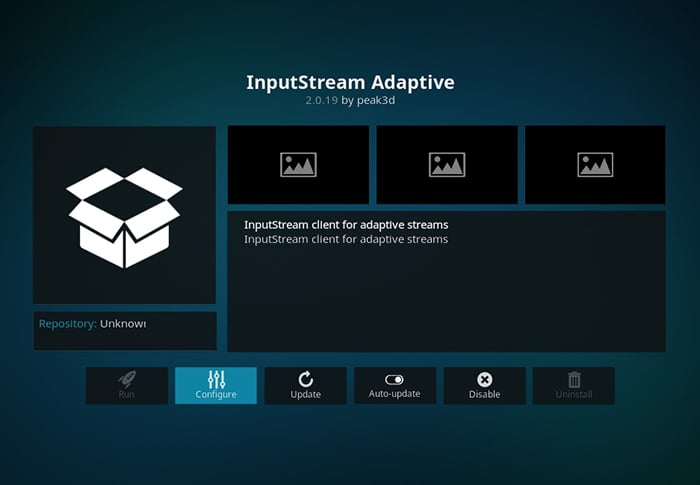
- Next, navigate to VideoPlayer InputStream > InputStream Adaptive. Click on this dependency’s name;
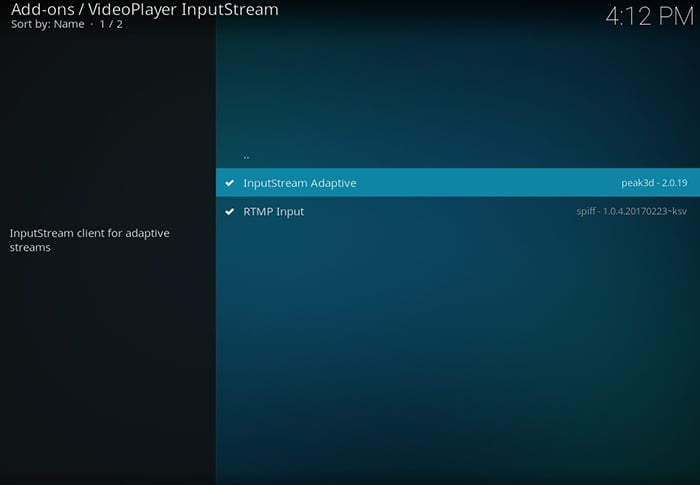
- Make sure that the dependency is enabled. You will see a large button at the bottom of the screen that says either ‘Enable’ or ‘Disable’;
- Return to the home screen of Kodi.
Step #5: Launch Git Browser
Finally, we are ready to start installing popular Kodi addons. First, you need to open Git Browser, and here’s how to do that.
- Open Kodi and click on ‘Add-ons’ in the main menu;
- Then, click on ‘Program Add-ons’;
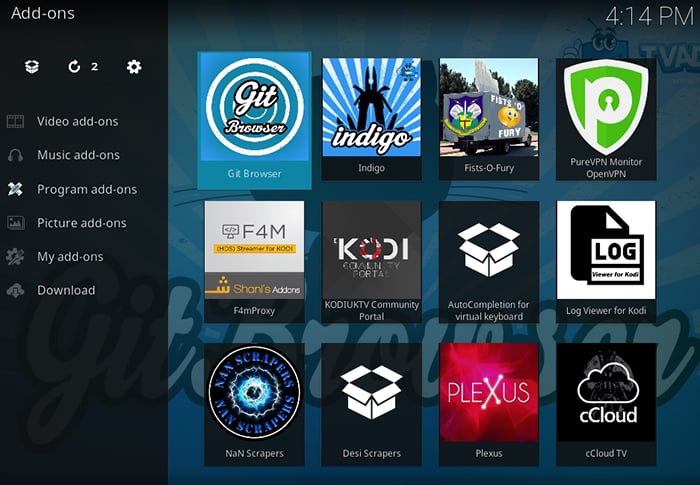
- On the right side of the screen, find and click on the ‘Git Browser’ addon;
- In case you see a notice, click anywhere to dismiss it;
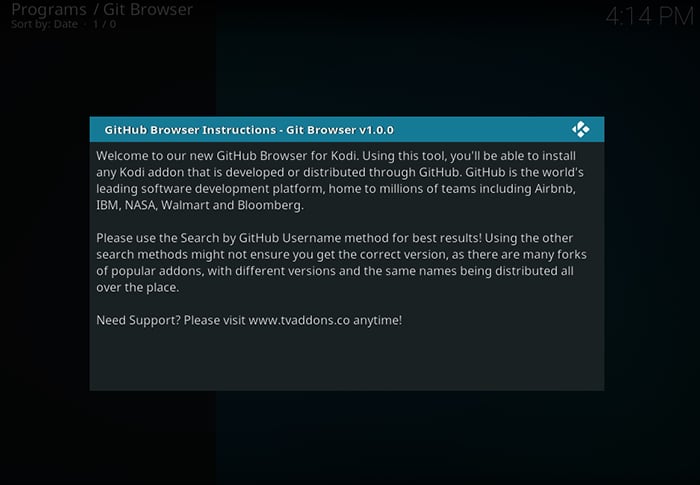
- Finally, we are going to use the first option – ‘Search by GitHub Username’;
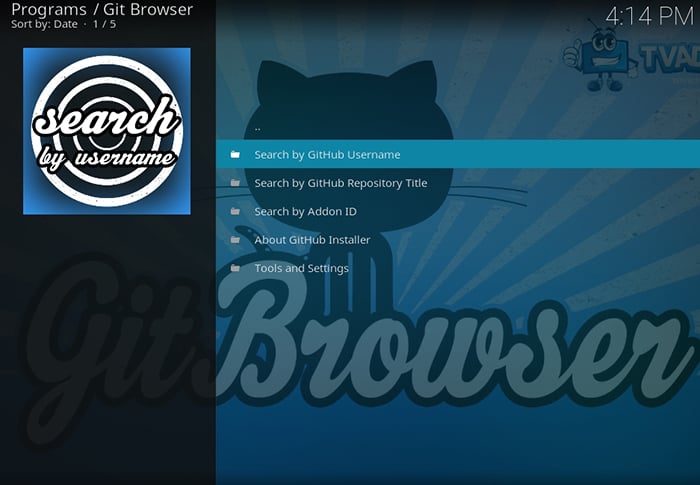
- Keep on reading as we’ll tell you about different username and the most popular streaming addons.
Step #6: Install Incursion (Exodus Fork)
Here’s how to install Incursion, one of the most popular (and newest) addons that is all about movies and TV shows;
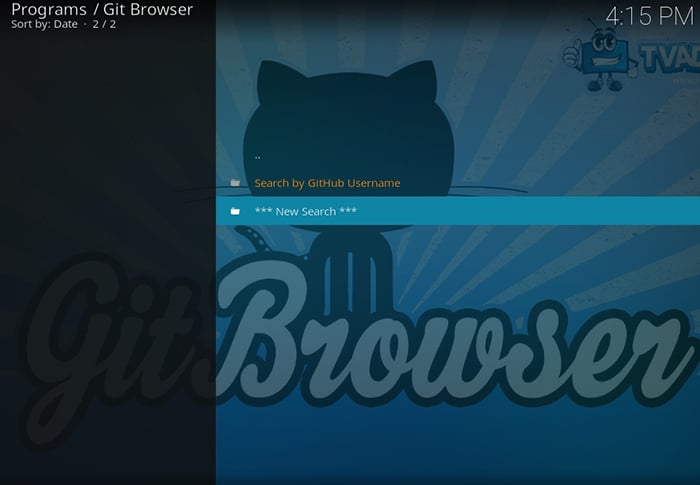
- Click on ‘New Search’;
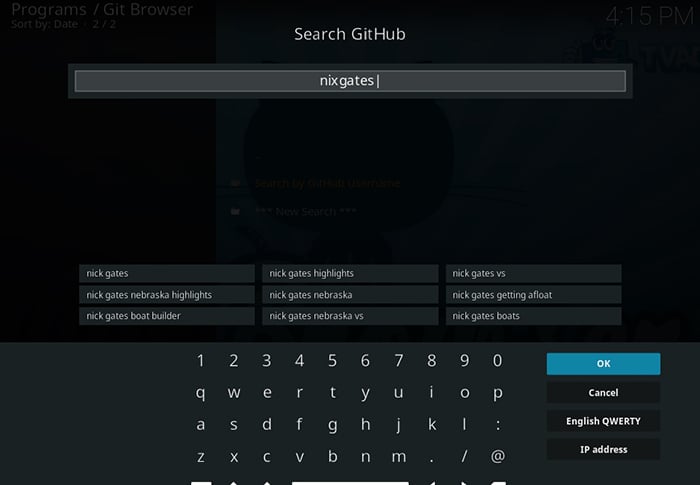
- Type in ‘Nixgates’ which is a GitHub username;
- Click on ‘incursion.repository-0.0.2.zip’;
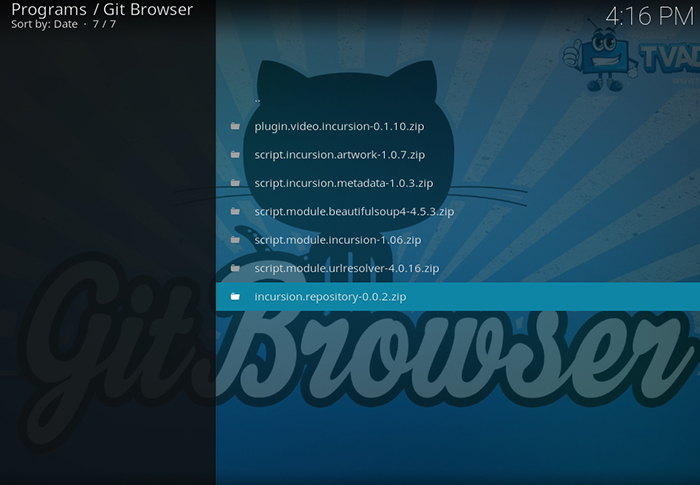
- Then, click on ‘Install’, wait a few moments and click on ‘Continue;

- Now click on ‘plugin.video.incursion-0.1.10.zip’;
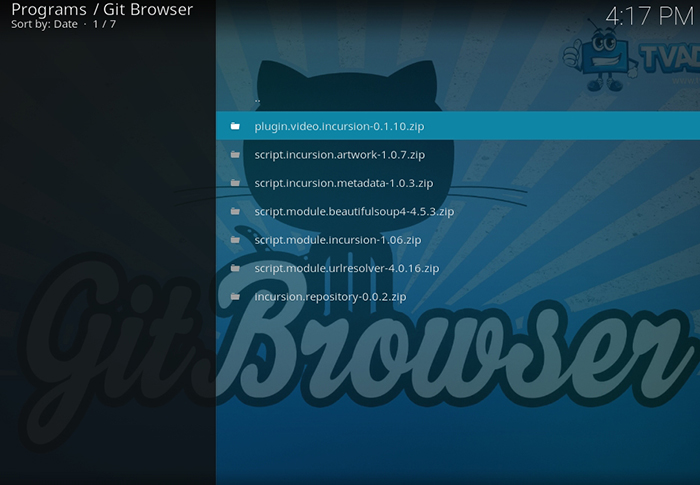
- Once again, click on ‘Install’ to install the addon;
- Finally, click on ‘Continue’ to continue installing addons;
- Press ‘Back’ to return since we’ll now need to search for a new username;
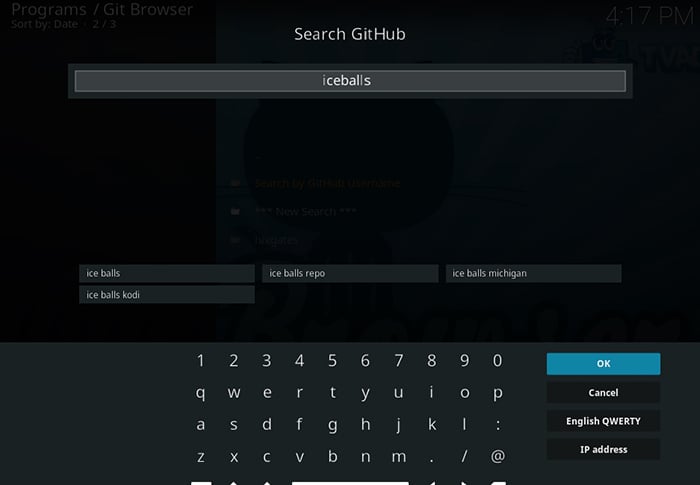
Step #7: Install 1Channel (All-in-One Addon)
Next, we have a very interesting addon that combines many different types of content. Here’s how to install 1Channel on your Kodi:
- Click on ‘New Search’ once again;
- This time, search for ‘Iceballs’;
- Find the entry named ‘repository.iceballs-1.0.0.zip’ and click to install it;
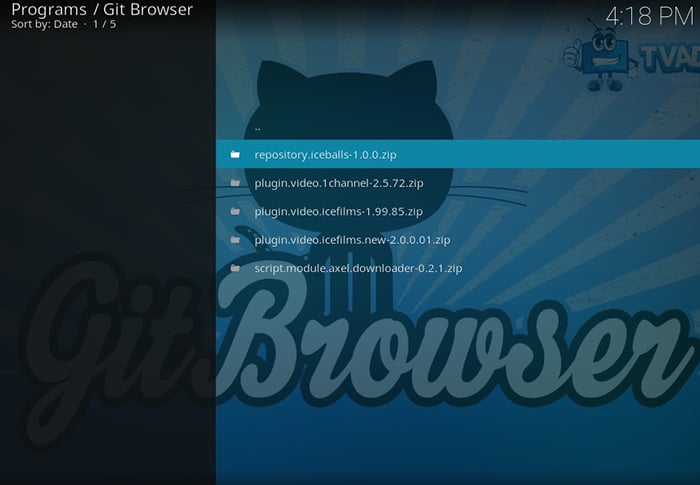
- Next, install the addon named ‘plugin.video.1channel-2.5.72.zip’;
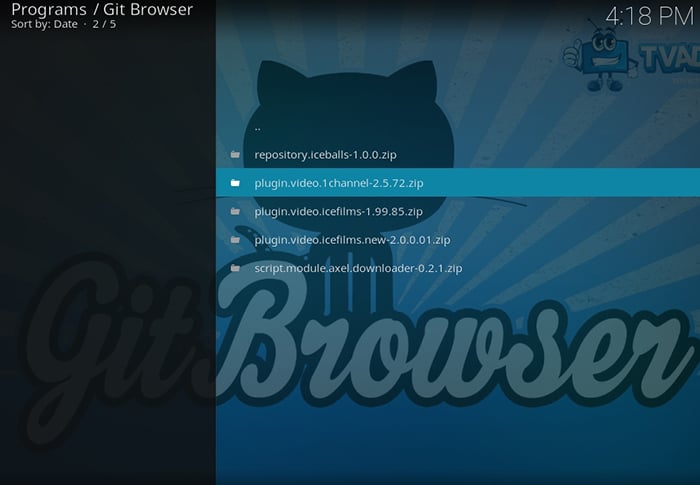
- Click on ‘Install’ and then click on ‘Continue’ if you want to follow this guide to the end.
Step #8: Install Gaia (Bubbles Fork)
Gaia is a newly released addon that relies on a number of popular Web scrapers. These are scanning the Web looking for media streams and present them in an easy-to-use manner.
- First, click on ‘New Search’;
- Search for a ‘Gaiaorigin’ username;
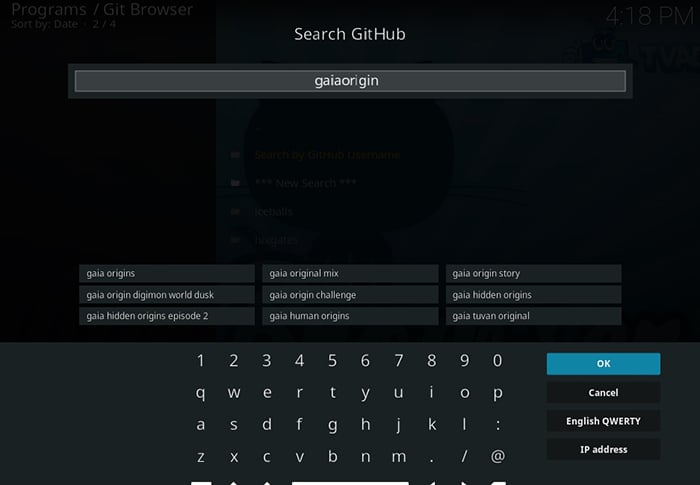
- Go ahead and click on the ‘plugin.video.gaia-1.0.0.zip’ and install the addon;
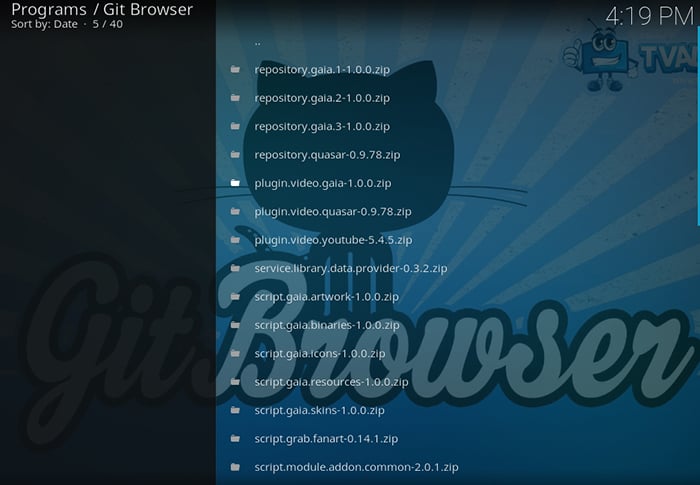
- Click on ‘Continue’ if you want to install other addons as well.
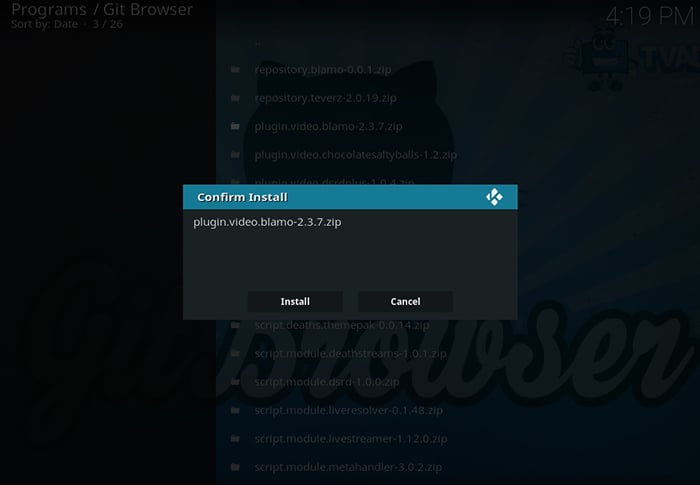
Step #9: Install Death Streams (SALTS Fork)
Finally, we end this guide with one of the most popular addons for movies. It’s called Death Streams and we are sure you’re going to love it.
- Like before, click on ‘New Search’ within Git Browser;
- Search for a ‘Teverz’ username;
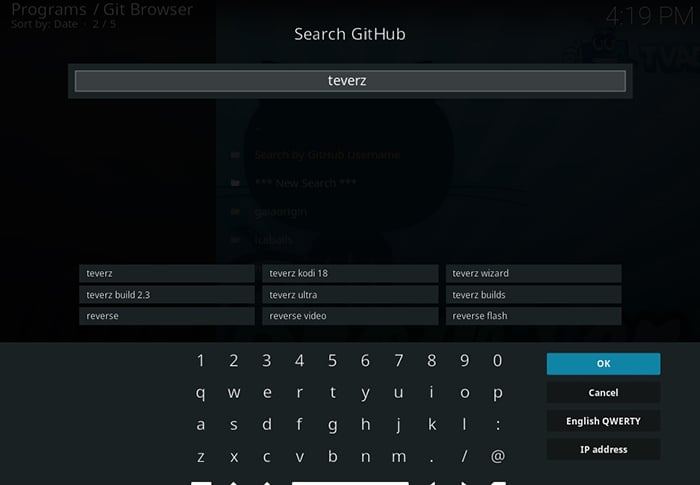
- First, install the ‘repository.blamo-0.0.5.zip’;
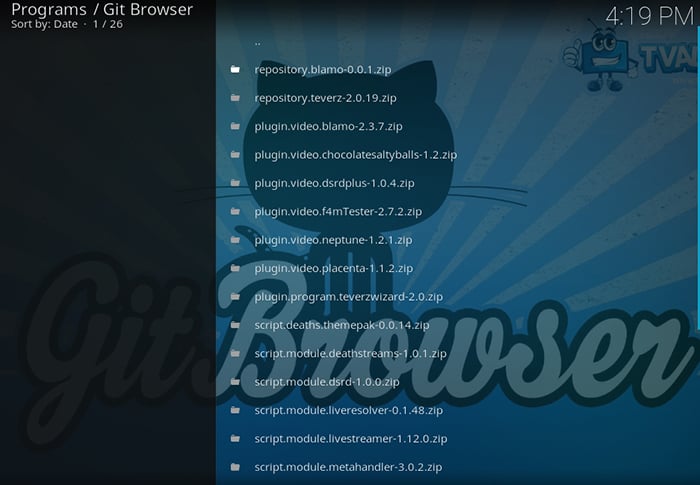
- Then, install the ‘plugin.video.blamo-2.4.8.zip’;
- Click on ‘Install’ and finally click on ‘Restart’;
- Wait for Kodi to open once again and you’ll see all your newly installed addons.
Additional Resources: What’s Next?
We hope that you’ve found our Ultimate Kodi Installation Guide to be helpful. In case of any issues, we’d like to provide a few additional resources:
- If you can’t install any of the addons on this list, you need to clear cache on Kodi. Click on the provided link for our quick and easy guide;
- Then, there’s the well-known missing dependency error. There are a few ways to resolve this issue in a safe way;
- If nothing else helps, we recommend checking our Kodi Troubleshooting Guide – where you’ll find plenty of useful tips and tricks.
Final Thoughts
There you have it, folks! What do you think about your Ultimate Kodi Installation Guide? We hope you didn’t have any issues and that you’re running this application without any problems. In case of any questions, feel free to post a comment below.
As always, we’d like to ask you to share this article online. This especially goes for those who’d like to spread the word about Kodi. Thanks!
The post Ultimate Kodi Installation Guide + Popular Streaming Addons (Git Browser) appeared first on Husham.com.
Written by David Minister